Thursday, May 10, 2012

Mini-me aprons

So this is my latest idea. I have been working on making child-size aprons to sell in my shop. I just thought I would share a little of what I have made so-far. Let me know what you think!
This one might be my favorite. It is reversible! I love the brown/teal material!

I ran out of fabric before I could make a tie for this one, so it's not quite done yet.


This one is fun. I especially like the cherries on the front!

Anyway, I am calling them Mini-Me Aprons and they will be available in two sizes, toddler and child. I am still getting a few things worked out before I list them in my shop. I'm thinking it would be fun to make matching adult size ones as well.

Wednesday, May 2, 2012

Indian Costumes

I've been pretty busy this past week working on some Indian costumes for my husbands Aunt and Uncle.

So I purchased this pattern...


Which, of course, is child-size. So I used the picture, as well as the internet, to come up with ideas and I made these....


  I also made matching headdresses and pants for the boy one, I guess I just didn't get a picture of those though. SO anyway, this is my first attempt at adult-size clothing...hopefully it will get easier with practice.

Tuesday, April 10, 2012

Etsy Shop

So I finally got my Etsy shop started. Here are the links to my first listings.


Monday, March 26, 2012

What I made today...


 Purple Tutu
This was made from a pair of pants that I cut apart and pieced into a dress.

It ended up being a little shorter than I had wanted so I added a ruffle on the bottom

I really like the pockets in the back
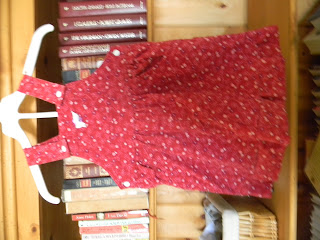
 Red Jumper
This was actually made from a pair of overalls that had holes in the knees.

I cut off the pants and then added little ruffles around the legs. I still need to get some matching buttons, it's just pinned together for the picture.
 Blue Short overalls
Simple spring dress with bolero jacket


Tuesday, March 20, 2012

More dress pics

 Well, I started with a dress that looked like this...
 Then I added some decorative trim around the hem, added a decorative bow, and made this jacket to match.
I then decided that I hated the bow and the jacket.

So this is what the dress looks like today...
front: I'm still not completely in love with this bow. I am trying to do something simple/understated so it doesn't take away from the jacket...

back

front with jacket

jacket up-close. I still need to add some type of fastener to the jacket like a button or bow or something.


back with jacket

back of jacket
Anyway, it is now done, except for the button on the jacket and perhaps a different bow on the dress front.

Monday, March 19, 2012

Ripped

I just wanted to take a moment to share with all you people who keep telling me I'm talented. Here is the real truth, I'm not. Did you notice this little guy in my last post?


 That, my friends is my seam ripper (I call him Fred). Without him, none of my creations would have ever happened. If you knew how long it takes me to complete a project and how many times I have to take things apart and start over, you would not think I'm talented at all, patient and persistent perhaps, but talented not so much. 

All kidding aside, I got a new seam ripper a while back and I LOVE it! Trust me, if you are anything like me, this is an item that is worth spending a little extra money for and learning how to use. I feel that I should also note that they are very sharp. Since my daughter cut herself with my rotary cutter, I have been EXTRA careful with my sewing supplies.


Turn an old sweater into a dress

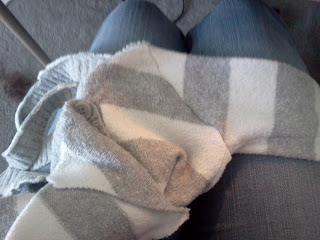
This morning I saw this old sweater hanging in my closet and thought, "that would be a cute little dress"

So I laid the sweater out on the floor and placed one of Brianna's dresses on top.

I traced around the dress with a pencil. A fabric marker probably would have worked better, but I don't have one.
Next I cut the pieces out making sure to keep the ribbing around the hood in tact.
I then cut the sleeves the same way, by placing the other dress on top and cutting to the length I wanted. I cut them a little longer than the other dress because I want to be able to roll them up.
Then I put the right sides together and sewed the side seams. I used a 1/4" seam allowance because it's knit and I knew it would roll/fray.
I actually had to take this seam out because it was crooked. Note: ALWAYS USE PINS!!!! Especially when working with knit fabrics!
Next I sewed the sleeves in.

And this is the completed sleeve.
This is what I have so-far.  Next I pinned the hood in where I wanted it to go and trimmed the ribbing to fit the new smaller neck/hood.
Again, I used LOTS of pins to hold it together and sewed the hood in place.
And here is the finished dress. This was so quick and easy. I can't wait for Brianna to try it on!